
This article is for those who are approaching the world of cybersecurity and are perhaps wondering which operating system is best suited for security testing, such as vulnerability assessment or penetration testing. We should start by saying that every operating system can be suitable for this purpose, but generally, you’ll need to spend some time configuring and installing the many tools required for “white hacking” activities. My suggestion is to start with a ready-made distribution, and in this case, I can’t help but recommend Kali Linux, which is already optimized and complete. Kali Linux natively offers a comprehensive suite of tools for securing systems and “ethical hacking” activities. Among the most important tools, we mention those specialized in:
- Information Gathering
- Vulnerability Analysis
- Exploitation Tools
- Wireless Attacks
- Stress Testing
- Reverse Engineering
- Hardware Hacking
- Forensics Tools
- Web Applications
- Sniffing & Spoofing
- Password Attacks
- Maintaining Access
- Reporting Tools

With Kali Linux, you can immediately start exploring and testing the various programs that the distribution offers. Among the various possibilities, you can:
- analyze vulnerabilities, databases, web applications
- execute exploits, brute force, stress tests, port scanning, reversing, spoofing, etc.
- find security flaws in wireless networks, wireless attacks
- obtain in-depth information on networks or computers and servers, software bugs
That said, the best way to appreciate the distribution is to try it. If you’re undecided and don’t want to spend too much time setting up a permanent environment, the quickest way to start with Kali Linux is to boot the “live” version from a USB drive. This method has several advantages:
- It’s non-destructive for existing systems, so it doesn’t make changes to the already functioning host system.
- It’s portable, so you can carry Kali Linux in your pocket on a USB drive and use it anywhere within minutes on an available system.
- It’s customizable: you can modify your Kali Linux ISO image to suit your needs.
- You can configure the Kali Linux “live” USB drive to have persistent memory.
Now, without further ado, let’s get practical and make a Kali Linux ISO bootable on a USB drive.
What we’ll need
First, download the latest ISO image from the official Kali Linux website. If you’re using Windows, to write the image to the USB drive, you’ll also need to download the Win32 Disk Imager utility from launchpad.net or sourceforge.net. On Linux and OS X, you can use the native dd command. You’ll also need a USB stick, at least 4 GB in size. (Systems with a direct SD card slot can use an SD card instead.)
Installing Kali Linux Live on a USB Drive
As mentioned, the installation procedure can vary depending on the operating system you’re using and the mass memory writing software. In this article, we’ll show the process for preparing the USB/micro SD device on Windows using win32 disk imager and on Linux and OS X via dd.
Procedure for creating a bootable USB drive on Windows
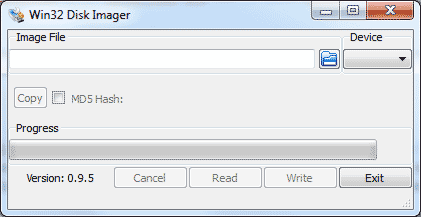
- Connect the USB drive to an available port on your Windows PC and specify the USB device identifier to the Win32 Disk Imager software (for example, “F:\”).
- Select the Kali Linux ISO file to write.
- Click the “Write” button.
Once the writing is complete, safely eject the USB drive from the Windows computer. You can now use the USB device to boot Kali Linux.
Preparing a Bootable Kali USB Drive on Linux
Creating a bootable USB drive in a Linux environment is quite simple. After downloading and verifying your ISO file, you can write to your USB stick using the following procedure. Remember to run the dd command as root or use sudo to get the necessary permissions. Be careful about which drive you start the writing process on because it’s irreversible and you’ll lose all the data stored on the device if you choose the wrong one. To do this, I recommend first identifying the device, so initially run the following command in a terminal window without the USB drive inserted.
sudo fdisk -l
You’ll get an output that will look more or less like this, depending very much on your system configuration and connected devices such as hard drives. In any case, you’ll definitely find the identifier – “/dev/sda” – containing the partitions (/dev/sda1, /dev/sda2…) if you have a standard configuration. In my case, there’s also /dev/sdb because I have two disks. This information is useful for comparison later when we insert the USB stick.

Now, connect the USB drive to an available USB port and run the same “sudo fdisk -l” command for the second time. The additional information you find, compared to the first command, will be what you need to proceed with the installation of Kali Linux.
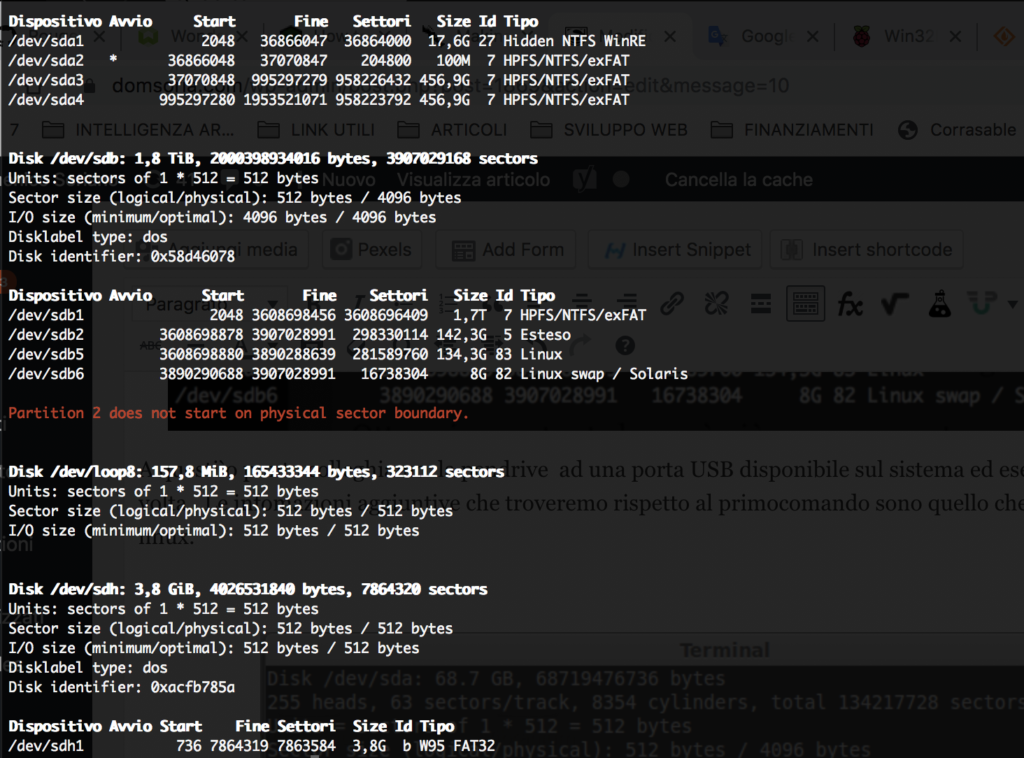
In this case, we can confidently say that our 4Gb USB drive is connected to the /dev/sdh1 device. Proceed with caution. Assuming the downloaded ISO file is named “kali-linux-2019.3-amd64.iso” and is located in the /tmp directory, run the following command:
dd if=/tmp/kali-linux-2019.3-amd64.iso of=/dev/sdh bs=512k
Writing the image can take a long time, so be patient. Since the dd command doesn’t provide feedback, don’t interrupt the writing. At the end of the process, you should see something like:
5823+1 records in
5823+1 records out
3053371392 bytes transferred in 746.211 s, 4.1 MB/s
You can now use your USB stick to start Kali Linux live.
Preparing a Bootable Kali USB Drive on OS X
The process for creating a bootable USB drive isn’t much different from Linux, especially since OS X is a UNIX-based system. Let’s review the steps. Again, be careful about which drive you start the writing process on because it’s irreversible and you’ll lose all the data stored on the device if you choose the wrong one. Start by identifying the devices available on your computer. First, run the following command without the USB drive inserted, in a terminal window.
diskutil list
You’ll see a list of available devices (similar to /dev/disk0, /dev/disk1, etc.), which is a list of disks mounted on the system, along with information on the partitions on each disk.
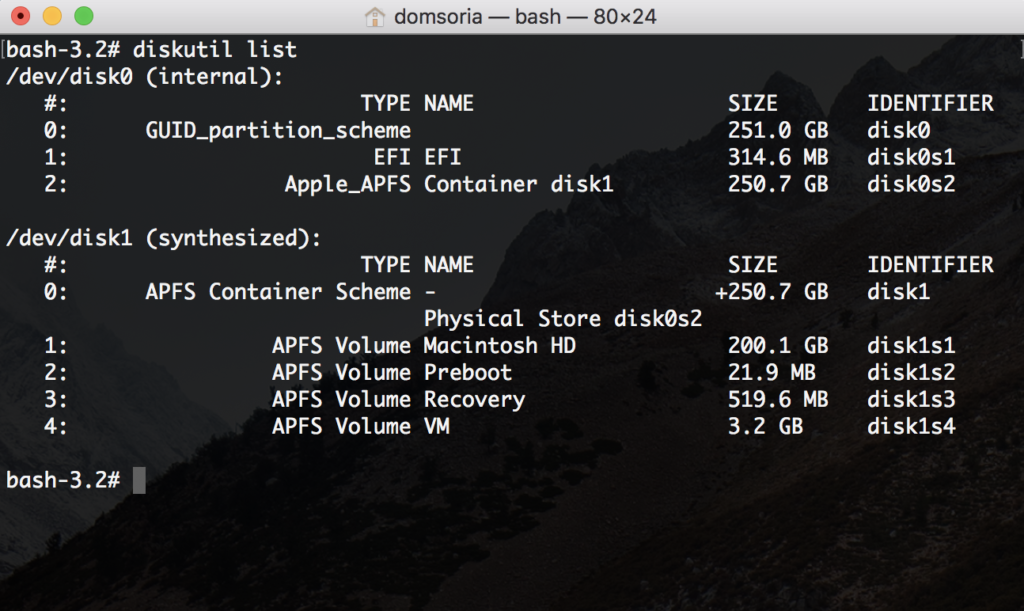
Now, connect the USB drive to your Apple computer’s USB port and run the diskutil list command a second time. The USB drive’s path will most likely be the last one on the list. In any case, it won’t be on the previous list.
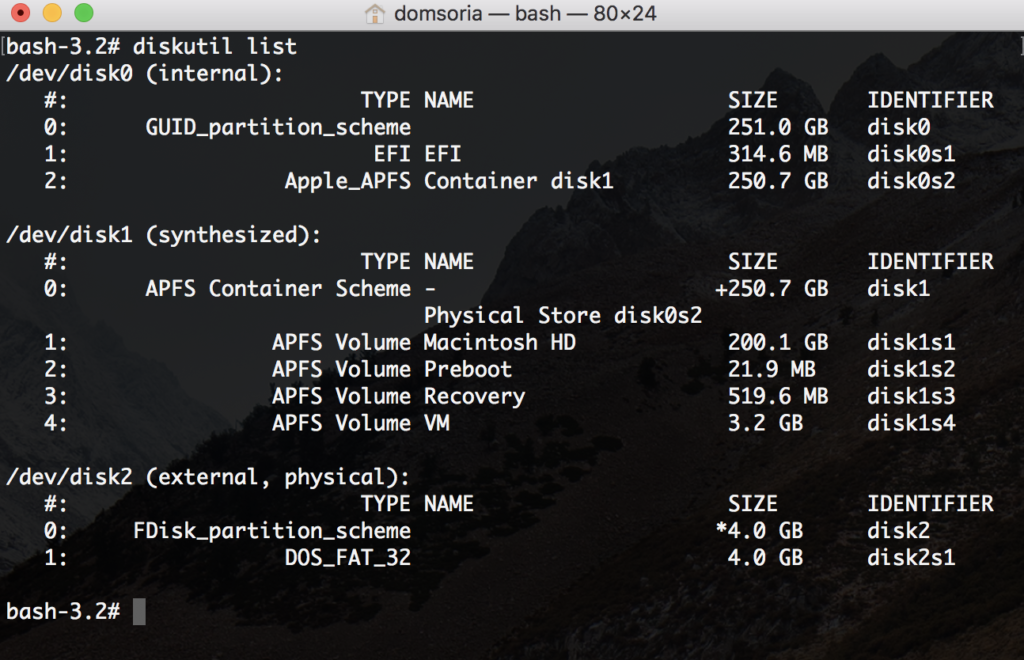
In this example, you can see that /dev/disk2 is now available. Unmount the drive (assuming, for this example, that the USB drive is /dev/disk2) by running:
diskutil unmount /dev/disk2s1
Now, proceed with caution. Assuming the downloaded ISO file is named “kali-linux-2019.3-amd64.iso”, is located in the /tmp directory, and the USB device is /dev/disk2, run the following command:
sudo dd if=/tmp/kali-linux-2019.3-amd64.iso of=/dev/disk2 bs=1m
Note: Increasing the block size (bs) will speed up the writing progress, but it will also increase the chances of creating a faulty USB drive. The chosen value for OS X has produced working images.
Writing the image can take a long time, so be patient. Since the dd command doesn’t provide feedback, don’t interrupt it. At the end of the process, you should see something like:
2897+1 records in
2897+1 records out
3037736960 bytes transferred in 21044.597244 secs (144348 bytes/sec)
It’s time to restart your PC and use Kali Linux. Do great things.

I am passionate about technology and the many nuances of the IT world. Since my early university years, I have participated in significant Internet-related projects. Over the years, I have been involved in the startup, development, and management of several companies. In the early stages of my career, I worked as a consultant in the Italian IT sector, actively participating in national and international projects for companies such as Ericsson, Telecom, Tin.it, Accenture, Tiscali, and CNR. Since 2010, I have been involved in startups through one of my companies, Techintouch S.r.l. Thanks to the collaboration with Digital Magics SpA, of which I am a partner in Campania, I support and accelerate local businesses.
Currently, I hold the positions of:
CTO at MareGroup
CTO at Innoida
Co-CEO at Techintouch s.r.l.
Board member at StepFund GP SA
A manager and entrepreneur since 2000, I have been:
CEO and founder of Eclettica S.r.l., a company specializing in software development and System Integration
Partner for Campania at Digital Magics S.p.A.
CTO and co-founder of Nexsoft S.p.A, a company specializing in IT service consulting and System Integration solution development
CTO of ITsys S.r.l., a company specializing in IT system management, where I actively participated in the startup phase.
I have always been a dreamer, curious about new things, and in search of “new worlds to explore.”

Comments